Hi everyone. Apologies for the extended posting delay. Some unexpected obligations have come up, and I’m working on sequencing and scheduling my various activities to make everything fit.
For the moment, allow me to close the loop on the Sheer Black Smoky Eye series that I initiated a couple of weeks ago. I opened the series with the basic ‘face’–a smoky eye nude cheeks and a nude lip. I thought it would be fun to take a look at the same basic face, changing only the lip shade–nothing else.
As a quick refresher, my basic face was a simple, at-home version of Wendy Rowe’s autumn/winter 2015 Burberry runway look. Inspired by Wendy’s ideas, I mixed a warm, illuminating primer with matte black shadow to create a sheer black wash for the lids. This was an interesting technique. I’ve always more or less agreed with Wendy Rowe that very dark shadow over the lid and around the eye can create an undesirable blank effect. (I’m sure that this can be made to work, it’s just that very dark shadow creates a lot of contrast with my pale skin–it can go horribly wrong. lol.) I’ve done plenty of soft smoky eyes with taupes and grays and the like, but this was a bit different because it captures the essence of true-black shadow, without the heaviness. If it’s a little tough to picture, the difference between this technique and a soft gray smoky eye, for example, is sort of like the difference between sheer black stockings and opaque gray tights.
Here are some swatches so you can see the effect close up:

From the left: Dior Glow Maximizer Primer; Blackout eyeshadow from the Urban Decay Naked 2 palette; primer and shadow, mixed.
Here’s the product set that I used to create the basic face…
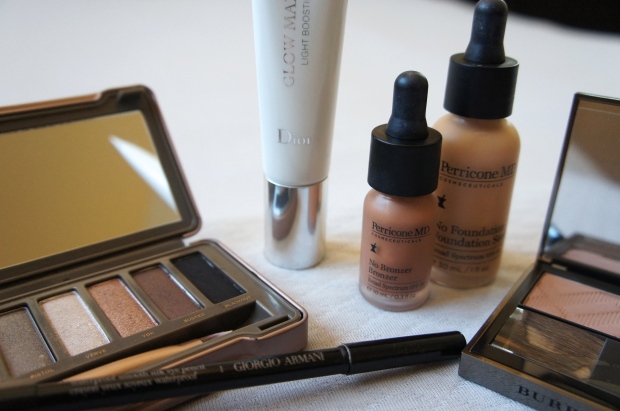
From the left: Blackout eyeshadow from the Urban Decay Naked 2 palette; Dior Glow Maximizer Primer; Perricone MD No Bronzer Bronzer; Perricone MD No Foundation Foundation Serum; Burberry blush in Earthy; Armani gel eye pencil in black (foreground).
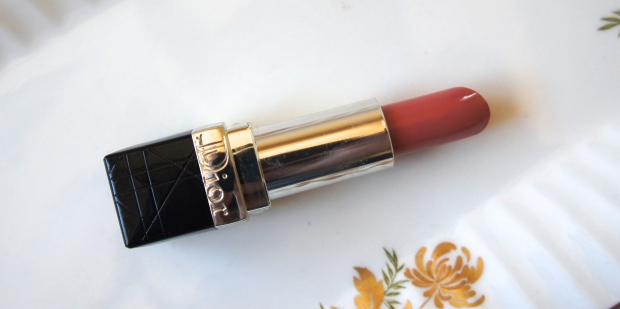
…with this peachy-pinky nude lipstick:
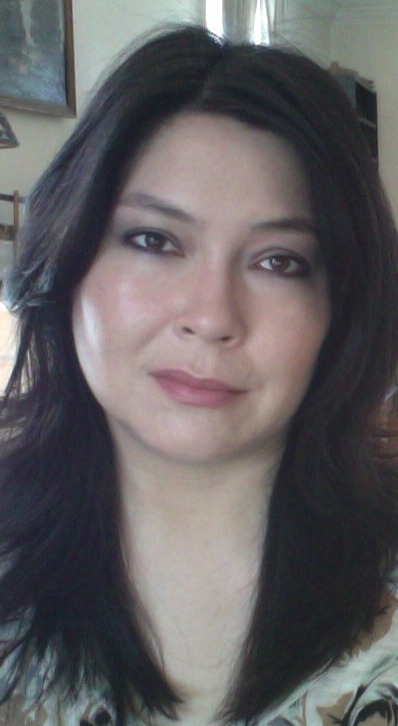
And here’s how it appeared on my face!
Once I put together the basic face, I thought it would be fun to see how different lip shades would work with this version of a black smoky eye. Here are the lip products I chose:
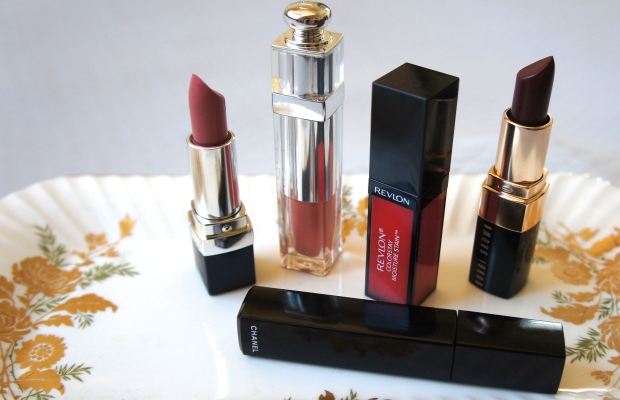
Upright from the left: Rouge Dior Nude Lip Blush in Charnelle; Dior Addict Fluid Stick in Mirage; Revlon Colorstay Moisture Stain in Shanghai Sizzle; Bobbi Brown Lip Color in Blackberry. In front: Chanel Rouge Allure gloss (recently reformulated) in Controversy.
And here are some swatches, so you can get a feel for the shades and finishes:

From the left: Rouge Dior Nude Lip Blush in Charnelle; Dior Addict Fluid Stick in Mirage; Revlon Colorstay Moisture Stain in Shanghai Sizzle; Bobbi Brown Lip Color in Blackberry; Chanel Rouge Allure gloss (recently reformulated) in Controversy.
As you can see from the swatches, I thought we could move from a soft nude shade in a classic lipstick finish (Charnelle, on the far left) to a more intense and glossy apricot shade (the Dior liquid lipstick in Mirage). I often think of Mirage as a nude, but when I see it in context with Charnelle, I see that it’s much more of a mid-tone apricot shade!
Next, I wanted to try a glossy red, to increase the intensity of the look further (Revlon long wearing liquid lipstick in Shanghai Sizzle). And finally, I thought we could try some vampier shades–not shades I wear often, admittedly, and definitely not with a strong eye, but this blog is all about trying out new combinations from my stash. So I thought we could take a look together and see what happens!
We’ve already taken a look at the basic face with Charnelle. Here’s the exact same look with Mirage:
I thought it was interesting how increasing the intensity of the lip shade a little bit, while keeping it in the same general peachy color family, just sort of changed the balance of the overall look. It still seems wearable to me, but the overall look is stronger and the eyes stand out less than they did in the first look. This is totally consistent with every beauty-mag article ever written about emphasizing eyes versus lips or lips versus eyes, but it was fun to see it in action on my own face. 🙂
Next up, the intense glossy red:
I like these Revlon Moisture Stains (and similar products from other lines like Laneige) a lot, I have to say. I find them easier to wear somehow than YSL Glossy Stains–they’re more comfortable than Glossy Stains, and the gloss finish is softer, less patent-leather than Glossy Stains. That said, a similar look and finish is easy to achieve with lipstick and a sheer gloss. Technological advances are interesting and fun to try, but on some level, there’s nothing new under the sun! I added no pink blusher or anything to this look–I made no changes to the look from the basic face as described, except for the lip color. But you can see that the red brings out the surface redness in my skin. My skin is so sensitive at the moment that it’s showing a lot of redness, but I’m doing very little to try to neutralize it, because applying a lot of base just seems to make the redness worse. Mostly I’m just trying to concentrate on skin care–really coddling my skin–rather than pursuing perfection through base makeup. That’s just the way I prefer to approach things–hope the redness and whatnot isn’t too distracting for everyone!
But I digress…back to trying on lippies! The red, I thought, was flirty and fun in concept, if perhaps not the best fit for sensitive, pinky skin. The lips seem to stand out a lot more versus the eyes when dressed in glossy red–the balance in terms of emphasis has shifted toward lips and away from eyes, I think.
Now, the vampier, brownish-berry shades. Both of these–Bobbi Brown Lip Color in Blackberry, Chanel RA gloss in Controversy–are a lot more neutral to my eye than, say, the bright warm red or the glossy apricot shades. Both the Bobbi Brown and Chanel shades seem to have a healthy dose of blackened brown.
I tried on the Bobbi Brown shade as a medium-intensity, matte stain:
How did I feel about this? It’s interesting…it just seems really dark. Let me put it this way–with pale skin, dark eyes, and dark hair, I think a sheer-black eye and a sheer, blackened-berry matte lip just isn’t quite enough lift for my complexion. And this is with the pinky-redness showing in my cheeks! If I weren’t showing so much natural flush in my cheeks, I might have suggested that some extra blush would give more of a lift. As it is, though, I think dialing the deep color to more of a wine shade, or more of a purple shade–basically stirring more red into the shade, whether it leans warm or cool–might be better. (Although it’s hard to guess without actually trying it!) Definitely an interesting experiment, though, and I think this look has certain merits. It’s sort of a little bit goth-y and who knows? There might be occasions where that’s exactly the kind of statement I want to make! Anything’s possible.
OK, one more lippy to try! I blotted down the Bobbie Brown lippy, leaving a slight stain on my lips, and applied the Chanel gloss over the top:
With an underlying blackened-berry stain and a pretty highly pigmented gloss, less of the natural rosiness of my lips is showing through in this final lip look–it’s a more committed version of this vampy lip, you might say. And interestingly, although it reads as more harsh in a way, I kinda like the more committed vampy lip better than the sheer-stain vampy lip. The lips look a bit more purple here than they do in the stained version, which I think is actually good, in a way. I notice that these blackened-berry shades are picking up on other sludgy blackened areas on the face, so the black cloud around my eyes looks sludgier. Really paying attention to taking down under-eye circles and making sure that the cloud of black around the eye is well applied–no little mistakes that might drag the corners of the eye down–this would seem to be imperative to me to genuinely pulling off this look. It might be worth noting that I use this gloss as a shade intensifier for the most part (over reds, vibrant berry shades, and the like). Rarely do I wear it alone. A lip look like that–a vibrant underlying shade intensified by this gloss–might be a good fit for this basic face. I won’t know until I try it!
For now, though those are all the combinations I have for you. I personally like to think about makeup as a form of expression–I prefer it to be flattering and beautifying, in general, but I’m definitely willing to think about looks that aren’t optimally flattering if they make a statement that I find interesting and appropriate for the occasion. So it was really fun to try out all these lip shades and develop some ideas for future looks. I can confirm Mary Greenwell’s maxim that changing the lip color totally changes the overall look–it’s easy and quick to do. If nothing else, then, the next time I have a special occasion or night out, I might just quickly check out a couple of alternative lip looks before I leave for the evening. It’s such an easy way to generate options.
I hope you enjoyed this little experiment! Digging around in my stash to find the right shade to create the first, nude lip–I finally settled on Charnelle–made me think a lot about how difficult it is to find the right nude lip shade. So I think the next look I’ll explore will feature the most pale and delicate nude shades that I can find in my stash. In the meantime, I wish you all a lovely day!
xo bunikins

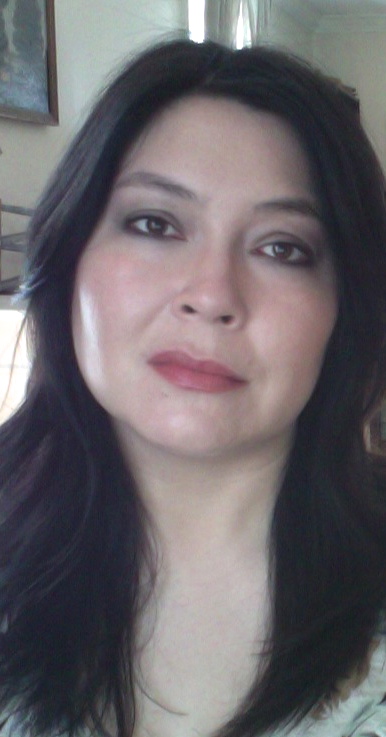


Welcome back! We missed your loveliness, and your wonderful posts.
No fear with the dark shadows, though; because you really rock the look.
I get you about the nude lip. I’m not exactly pale (nc20) but finding the right nude without looking like a denizen of the morgue can be tough for me; so I cam looking forward to your next nude lip search. Also, go forth in good stead – beautifying or not – make a statement!
LikeLike
Hi! So nice to see you again, thanks so much for visiting. I’m glad you liked the dark shadow–the paler I get through the winter, the harder it seems to be to pull off. It was nice to give a really bold look a whirl, and I forgot to mention in my post that what might seem really harsh in daylight could be a lot easier to pull off in the evening.
I do think there’s something liberating in making a statement. Speaking of which, I’ve been looking at colors and products that might work for a look inspired by the Wong Kar-Wai movie, “In the Mood for Love,” so I haven’t forgotten about that! I’m thinking of using the movie for color-palette inspiration, which is leading me to colors that read a little more autumnal to me than spring-like, hence the delay in pursuing the look. But I haven’t forgotten! 🙂
Thanks again for stopping by and for your kind words–lovely to see you.
LikeLike